Your Philips is probably not broken, it is still running the settings it shipped with
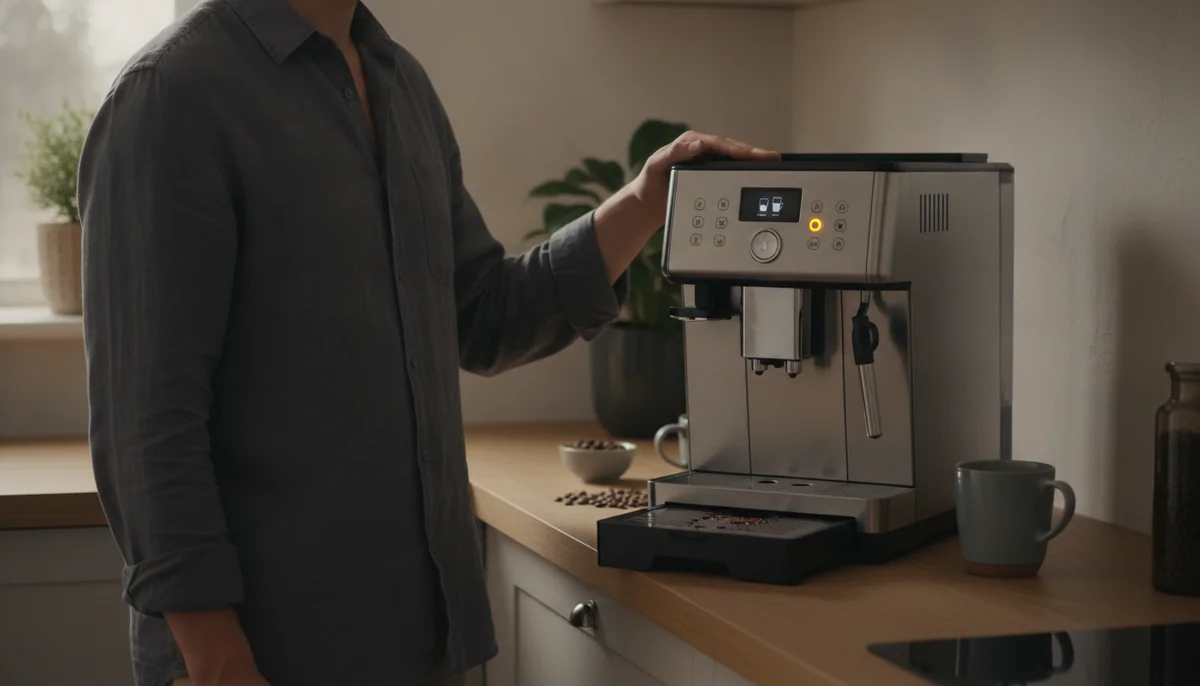
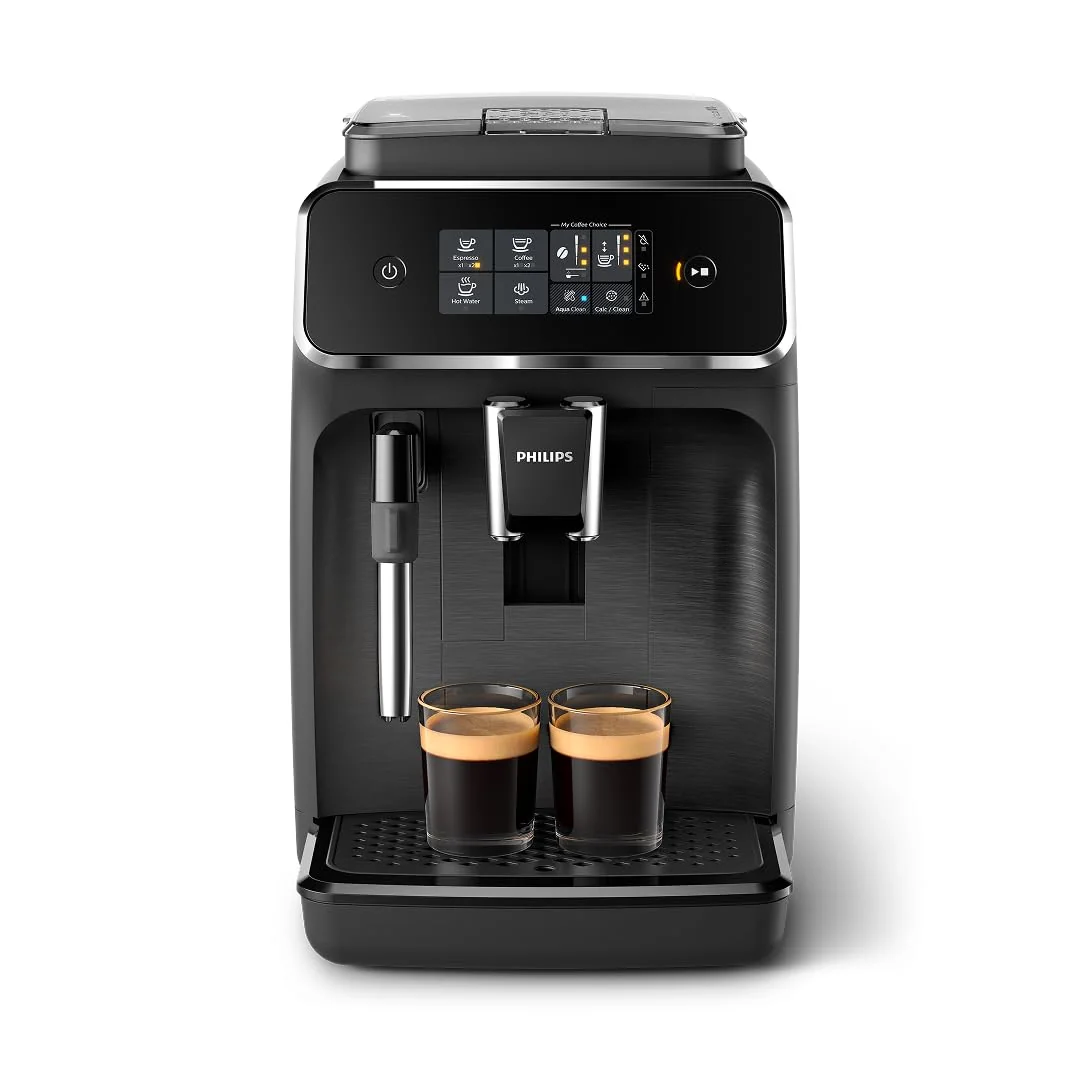
There is no screen on any of these machines. What Philips calls an intuitive touch display is a panel of backlit icons with illuminated scale marks, which reads like a display from the other side of the kitchen and tells you almost nothing up close. That design decision is the root of nearly every question people ask about a 1200, a 2200 or a 3200. There is nowhere for the machine to say raise the temperature, nowhere for it to say the filter is due, and nowhere for it to explain that the light you are staring at means the drip tray is a centimetre out of position. So every adjustment became a press-and-hold on a button that appears to do something else, most of them with the machine switched off, and none of them printed on the fascia.
Then there is the manual, or the absence of one. At least one US buyer opened the box to find no quick-start guide, a QR code that resolved to a 404, and a web address that funnelled them through filter offers and extended warranties in several languages before they gave up and worked the machine out by pressing buttons for a day. Other boxes do contain printed material, so this is not universal, but it explains why so much of the traffic around these model numbers is people hunting for instructions rather than reviews.
Espresso Den has not had any of these machines on a bench, and nothing below is presented as our own measurement. What this page is is the operating knowledge that should have been in the carton, collected from the people who did weigh, time and dismantle them, and written for all three machines at once because they share most of their controls.
First, work out which machine you are actually operating
The buttons differ more than the coffee does. A reviewer who set a 2200, a 3200 and a 5400 to identical beans, identical grind, maximum strength and shortest volume pulled shots of 37, 32 and 35 grams and could identify no meaningful difference in taste or temperature between them. The brew group and the ceramic burrs are common across the range. What the money buys as you climb is drinks, milk automation and, higher up, a real screen.
| Machine | What the panel gives you | The honest catch |
|---|---|---|
| 1200 Series, EP1220/04 | Espresso and coffee at one or two cups, hot water, and a manual steam wand you work yourself. | The AquaClean filter named in the product title is not included with the US version, and Philips says so on its own product page. |
| 2200 Series, EP2220/14 | The same three presets with a slightly different fascia, and the listing sells it on exactly that. | Two owners independently describe water pooling under a brand-new unit on day one, one of them across more than one example of this model. |
| 3200 Series LatteGo, EP3241/54 | Espresso, coffee, americano, cappuccino and latte macchiato, plus a two-part milk carafe that rinses under the tap. | Milk temperature is not adjustable at all, and a cross-model comparison measured cappuccino milk landing in the mid-forties to mid-fifties Celsius. |
Our verdicts on each of those, at length, sit on their own pages: the 1200 Carina is the cheapest honest way into a Philips brew group and is best treated as a pod-machine replacement rather than an espresso machine, the 2200 is that same engine with a friendlier layout and is a very good long-coffee machine that keeps insisting it makes espresso, and the 3200 LatteGo is the one to buy if what you actually want is a cappuccino nobody has to learn anything to make. If you are still choosing, the 1200 against the 2200 and the 2200 against the 3200 are the two forks that matter, and the full walk up the Philips ladder says where each rung stops earning its money.
The three-second press, and every menu it opens
Here is the pattern nobody explains. Adjustments that change how a single drink comes out are made while the machine is awake, by tapping the strength and volume icons before you press a drink button. Adjustments that change how the machine behaves are made while it is switched off, by holding one of those same buttons until the lights start flashing. That is the whole logic, and once you have it, the machine stops feeling like a puzzle box.
| What you want | What you actually do |
|---|---|
| Raise the brew temperature | With the machine off, hold the cup-volume button for two to three seconds until the lights flash, then select the top level. |
| Set water hardness | With the machine off, hold the bean or strength button for about three seconds and pick a level using the test strip that came in the box. |
| Brew from pre-ground or decaf | One level scoop into the bypass chute, choose the drink, then hold the aroma button for three seconds so the machine skips the grinder. |
| Activate a new AquaClean filter | Shake it, hold it upside down in cold water until the bubbles stop, fit it, then hold the AquaClean icon for three seconds and press start. |
| Start a descale | Hold Calc/Clean for about three seconds with a full bottle of Philips descaler in the tank and a 1.5 litre container under both spouts. |
Two practical notes on the panel itself. The buttons are capacitive and on at least one teardown they were tuned hard against false touches, to the point where a firm, flat fingertip works and a fingernail does not. And when you hold a button and the lights begin to flash, you are in a menu with no exit prompt, so make the selection you came for and let the machine settle rather than tapping around to see what happens.
The five settings that decide whether it tastes like anything
Before any of this is worth doing, you need to know what these machines are working with. A reviewer who stopped the cycle after the grind and weighed the charge got about 6 grams on the low aroma setting and about 7 on the high, against 30 millilitres out at the shortest volume, roughly 40 in the middle and around 65 at the top. Another, weighing spent pucks across the same family, consistently found 8 to nearly 11 grams and noted the dose moves with the settings and the density of the bean. Both used scales, both are experienced, and they disagree on the number while agreeing completely on the direction: the dose is small for espresso, and every gram you are short is a gram of resistance the puck cannot offer.
Which means the middle volume setting, straight from the factory, is a lungo wearing an espresso's clothes. That is not a fault to report. It is arithmetic, and the only lever you have is to stop stretching it.
| Control | Where to put it | Why it matters |
|---|---|---|
| Temperature | Top level, set with the machine off | Hotter water pulls more out of a small dose, and the machine does not ship at the top. |
| Strength | Maximum, or one step below | It is a dose control rather than a flavour profile, and dose is the thing you are short of. |
| Volume | Minimum | Flavour concentrated into 30 millilitres beats the same flavour stretched across 65. |
| Grind | Mid-fine, moved one step at a time | Coarse grounds let water sprint through the puck, which is what pale, fast, crema-free shots are. |
| Beans | Matte and dark, never shiny with oil | Oily beans give sludge instead of a formed puck and are the classic cause of a watery first week. |
If you want a long drink, do not send more water through the puck to get it. Put hot water in the cup first from the wand, which runs at around 84 degrees Celsius and is honest tea water, then drop a short shot on top. That also preheats the cup, which matters more than it sounds when the drink is small: one 3200 owner put a thermometer in the coffee stream at the highest temperature setting and read about 196 degrees Fahrenheit, which is inside the accepted extraction band but has nothing spare once it hits cold ceramic and fridge-cold milk. The longer version of this argument lives on our pages about watery bean-to-cup espresso and machines that never seem hot enough, and if a full mug is what you are really after, getting filter-style coffee out of one of these is its own problem.
The grinder knob, and the two cups you have to throw away
The adjustment sits inside the bean hopper, and it can only be turned while the grinder is actually running, because a hopper full of beans jams it solid otherwise. Move it one step at a time, never more, or you risk the mechanism. Then throw away the next two drinks, because the old grind is still sitting in the chute and the change you just made is not in your cup yet.
Where to set it is the one thing the careful sources refuse to agree on. Coffeeness settles at level 3 of 12 and deliberately declines to go finer, on the grounds that an economy machine is prone to blockages and an overloaded pump, and adds the sceptical aside that twelve settings is partly there to attract people who know what grind size means. Cafelista goes to the finest position available and finds water still passes through the puck a little too easily. One owner of a 1200 uses the finest setting with a dark, low-oil roast and gets solid puck discs where an oily medium roast had given nothing but sludge. All three can be true, because beans decide it. Start mid-fine, move one step, brew three cups, judge. Our guide to which beans survive a bean-to-cup grinder is the cheap version of that lesson.
The 2x button is two coffees, not a double
This is the most misunderstood control on any of these machines. It does not push extra water through one puck, and it does not grind a bigger dose. It runs two complete cycles back to back: grind, brew, eject, grind, brew again. A 3200 owner describes exactly that behaviour and uses it deliberately, pressing 2x to get eight ounces of coffee out of two four-ounce cycles.
As engineering, that is more honest than the alternative, because each drink is extracted properly rather than diluted. As a way to make a double espresso in one cup, it is a compromise, since each cycle carries its own rinse and the second shot lands on a drink that has already started cooling. Use it when two people want coffee, or when you genuinely want a bigger black coffee built from two real extractions rather than one over-stretched one.
The same limitation shapes the milk drinks on the 3200. The cappuccino and latte macchiato buttons are built around a single shot, which is why one owner runs the latte macchiato twice to fill a mug and describes the result as a healthy amount of espresso rather than an ordinary one. If your café cappuccino tastes stronger than the one your machine makes, that is why, and the fix is to build the milk drink and then run a separate espresso into the same cup. We go into it further in the 3200 review.
Pre-ground coffee, decaf, and the chute that also breathes
The bypass chute exists so that one person in the house can drink decaf without emptying the hopper, and it is the feature most likely to convince a new owner their machine is faulty. The sequence is strict. Put in one level scoop and no more. Select the drink. Then hold the aroma or strength button until the scoop icon lights, and only then start the brew. Miss that hold and the machine has no idea there is coffee in the chute, so it does what it was asked and sends water into the cup, which is precisely the complaint one 1200 owner filed against the feature.
There is no memory here either: it is one scoop for one drink, every time. On the 3200 the same aperture doubles as a vent, so let the machine finish its startup rinse before you load it, close the lid straight after, and do not preload it the night before. One owner needed two or three attempts before the machine accepted the grounds at all, then found it repeated without complaint for the rest of that power cycle. Our guide to pre-ground and decaf in a bean-to-cup machine covers the part where the drink itself is different, because a bypass shot is not the same drink as a fresh-ground one.
What the lights are actually telling you
None of these icons carry text, which is why people photograph them and post them online. On the 2200 there are three, and reading top to bottom they mean fill the water tank, empty the dregs box, and either a door is open or the drip tray is not fully home.
| What you see | What it means | What to do |
|---|---|---|
| Water tank icon | The tank is empty or not seated | Refill and push it fully home; the machine warns you before it wastes a dose rather than after. |
| Grounds or dregs icon | The puck bin has hit its count | Empty the bin and the drip tray, and do it with the power on, or the machine will not register it. |
| Bottom warning icon | A door is ajar or the drip tray is out of position | Reseat the tray and close the service door until it clicks. |
| Grinding noise changes, then the drink stops | The hopper has run dry | Refill the beans; if the machine sulks after an aborted cycle, a power cycle brings it back. |
| AquaClean icon | The filter has reached the end of its count | Fit and activate a new one, which owners find comes round every few months. |
| Calc/Clean icon | A descale is due | Run the full cycle, and do not simply keep brewing around it. |
| All the lights on together | The general error state | Reseat the tank, pull and rinse the brew group, and empty the bin again with the power on. |
Two of those deserve more than a table row. The grounds bin genuinely counts pucks rather than looking inside itself, so if you empty it while the machine is asleep it stays convinced the bin is full and refuses to brew; switching on and pulling the already-empty bin out again clears it, and that single behaviour accounts for a striking share of the my-new-machine-is-broken posts. And the brew group has to go back in aligned, with its reference marks lined up and without pressing the release, or the machine will run water through and produce no coffee at all, which reads exactly like a dead grinder.
Water in the drip tray is normal, incidentally, because these machines rinse themselves on startup and shutdown and milk drinks add condensate on top of that. Brown brewing water arriving in the tray instead of your cup is not normal, and the common cause is the seal on the water inlet nozzle, a small part that comes out on two screws. That distinction is worth holding on to, because one is housekeeping and the other is a repair.
Milk: take the sleeve off, or take the carafe apart
On the 1200 and the 2200 the wand arrives wearing a panarello, the plastic sleeve that drags air in through a pinhole and froths for you. It produces a great deal of foam and very little silk, described by one reviewer as very frothy but not really silky and by another as large bubbles that put latte art out of reach. Take the sleeve off, steam on the bare single-hole tip with the tip to the side of the pitcher to start a whirlpool, and the same machine gives milk the same reviewer called nearly comparable to a normal espresso machine, silky enough to pour a heart. That is the highest-value thing you can do to either machine and it costs nothing but a jug and a fortnight of practice. Purge and wipe the wand immediately afterwards, every time, so milk does not dry inside it.
When a frother stops frothing, work through three things before you conclude it is dead. If the silver outer part is pushed on too tightly it blocks the small air hole and you get nothing, which one owner spent a while believing was a defective machine. Check that the small tube still protrudes from the bottom of the sleeve rather than sitting retracted inside it. And descale the machine, because a badly scaled unit produces exactly this symptom and steams normally again afterwards.
The 3200 sidesteps all of that with LatteGo, which is two plastic parts with no tube and no channel living permanently inside the machine, cleaned under the tap or in the dishwasher. Follow Philips's own first-use setup for it rather than guessing, because the carafe has to seat properly to draw at all. What you give up is control: there is no milk-only button, so anything the machine does not already know has to be made by starting a milk drink and stopping it, and the milk temperature is fixed. Which of those two systems you want is genuinely the decision that determines whether you use the machine on a Tuesday, and it is the whole subject of our piece on steam wands against automatic milk systems.
Calc/Clean, AquaClean, and the numbers behind 5,000 cups
Every one of these listings promises up to 5,000 cups without descaling if you change the filter when prompted. Translated into something you can act on: with an AquaClean fitted and always replaced in time you descale roughly once every eighteen months, and without a filter you should expect to descale about every three months. That gap is the entire value of the filter, and plenty of owners land on the wrong side of it by using bottled or fridge-filtered water and skipping the cartridge, which is good for taste and does nothing whatsoever about the descaling interval. Check whether one is even in your box, because the US 1200 does not include the filter its own product title advertises.
Set the water hardness with the supplied test strip on the day you unbox the machine, or the counter is guessing. Then, when Calc/Clean lights, Philips's own rules are worth following to the letter: use their descaler and nothing containing sulfuric, hydrochloric, sulfamic or acetic acid, which puts vinegar firmly out; take the AquaClean filter out before you start and fit and activate a fresh one at the end; do not interrupt the cycle, which can take up to half an hour. Philips also states that skipping descaling altogether voids the warranty, which is the part people discover late.
The rest of the routine is light and non-negotiable in equal measure: rinse the milk system after every use, rinse the brew group under the tap weekly, do a deeper clean monthly, and grease the brew group periodically with the food-safe tube that came in the box. Skip the weekly rinse and you find out why. One 2200 owner made the sharpest observation in the whole record, that a steam vent passes the grinder and wets any lingering grounds so residue cakes up over time, and a 3200 owner's wife noticed a mould smell coming from the cavity where used pucks fall, in the driest region of the United States. We lay the whole cadence out in our Philips descaling and AquaClean guide and the wider bean-to-cup cleaning schedule, and what neglect eventually costs is the subject of how long these machines last.
Where that leaves you on a Monday morning
Almost everything above is free. Temperature to the top, strength to maximum, volume to the minimum, grind mid-fine and moved one step at a time, matte beans rather than shiny ones, the cup preheated from the hot water spout, the sleeve off the wand if you have one. That is not a workaround for a bad machine, it is the machine being asked to do the thing it can actually do, and the difference between a Philips somebody loves and a Philips somebody returns is usually nothing more than that list. The two things it will not fix are the dose, which stays small however you set it, and the milk temperature on a LatteGo machine, which is not yours to adjust.
Frequently Asked Questions
Why does only water come out when I use the pre-ground chute?
Either the strength button was not held until the scoop icon lit before you started the drink, or the brew group went back in out of alignment after cleaning, and both produce exactly this symptom.
What does it mean when all the warning lights come on at once?
That is the general error state, and it usually clears by reseating the water tank, removing and rinsing the brew group, and emptying the grounds bin again with the power switched on.
Why does the machine still think the grounds bin is full?
It counts pucks rather than looking inside the bin, and it only registers the reset if the bin is pulled out while the machine is powered on.
Does the 2x button make a double espresso?
No, it runs two complete grind-and-brew cycles one after the other, which is two coffees rather than one bigger one.
How do I raise the brew temperature when there is no screen to do it on?
Switch the machine off, hold the cup-volume button for two to three seconds until the lights flash, then select the top level.
Is water in the drip tray normal?
Clear water is normal, because the machine rinses itself on startup and shutdown and milk drinks add condensate, but brown brewing water arriving there instead of in your cup points at the seal on the water inlet nozzle.
Can I descale it with vinegar?
No, because Philips names acetic acid among the substances that damage the machine and void the warranty.
Which grind number should I start on?
Start around a third of the way toward fine, move one step at a time while the grinder is running, and discard two drinks after each change so you are tasting the new setting rather than the old grounds still in the chute.
How do I get a stronger cappuccino out of a 3200?
Build the milk drink as normal and then run a separate espresso into the same cup, because the milk presets are built around a single shot.
Do I actually need the AquaClean filter?
Only if you would rather descale about once every eighteen months than about every three, which is the real difference the cartridge buys you.